by Mark Szabo
Kathi and I love hosting Thanksgiving! But it can be stressful since there’s so much food to cook.
One way to take the stress out of it is to think about what you’re going to make, what needs to be cooked in the oven and for how long, what needs to be prepared ahead of time, and in what order you’ll do everything.
Now this blog isn’t going to focus on everything, but it is a bit of a recap of what our Deliciously Healthy Thanksgiving, focusing on a few Deliciously Healthy side dishes:Savory Maple Roasted Butternut Squash and Brussels’ Sprouts, Baked Green Bean Casserole, and Healthy Mashed Potatoes, in that order.
Why that order? Because the Squash and Sprouts take the longest, then the Green Beans, and the Potatoes are relatively quick. Doing it this way, we should be able to plan it so everything is all done at the same time.
START WITH PREPPING
Before we start prepping, the most important thing you can have when making your own food is a very sharp knife. And you want that knife to be a “Chef’s Knife,” with a long, thin blade that’s taller towards the handle and curves down towards the tip. You can cook just about anything with a sharp one of these.
So we start earlier in the day with trimming the ends from the Brussels’ Sprouts and sliced them in halves; peeingl the Butternut Squash trimming the top and bottom and cutting into cubes; trimming the ends from the Green Beans and cutting them into roughly 2-inch segments; clean, trimming, and slicing the Mushrooms to roughly ¼ inch thickness; peeling and trimming our Garlic cloves; cutting our Cauliflower into florets; and peeling our Potatoes, cut them into chunks and placed them in a pot of salted water to keep them from turning purple.
Butternut Squash Tips
This is one veggie that I want to go into detail because so many make it harder than it is and so they buy the pre cubed version at the market. It’s fine, but what do you do when you get it fresh from your farmer? Here’s how to easily prep your butternut squash.
First off, I see a lot of people trying to cut these in half by placing the whole thing sideways down on the cutting board, then trying to sort-of saw it with the knife lengthwise. If you’re having to force the knife through, your knife isn’t sharp enough. This is how people cut themselves, trying to leverage their entire bodyweight down through the knife. Then the knife slips and all of the downward force is redirected laterally, usually into the hand that was holding the food you were trying to cut.
What I like to do instead is chop the ends nice and flat so that I can stand it up on its bottom without it falling over. Now, I place the knife dead-center across the top, perpendicular to the cutting board, angle the blade a bit, then simply slice the whole thing right into two equally sized halves.
Deseeding with ease
Before we can cut it into cubes, we need to deseed it. I used to joke that you wanted to use the sharpest spoon in your drawer, but Kathi hit upon a brilliant alternative to make this job so easy! Use an Ice Cream Scooper!
Easy to grip handle, angled for digging, perfectly adapted for gouging the seeds from a Butternut Squash.
You can separate the seeds from the stringy mass, roast them and eat them like you would Pumpkin Seeds, set them aside for local wildlife to eat, or add them to your compost. Ours will most likely be consumed by our Chickens.
Cubing
When cubing something like this, I used to cut it into strips, then cut down each fat strip to size, then cut cubes out of each thin strip.
The easy way is to first cut lengthwise making one long strip, then rotate the Squash half so the side you just cut is flat down against the cutting board, then make lengthwise slices in this direction to the size you ultimately want your Cubes. Here we’re going somewhere between half an inch and one inch.
Rotate the Squash back so the original half line cut is back against the board, and reposition the slices you just made back into the Squash shape. Now, make lengthwise cuts again, then rotate 90° and make even side-to-side cuts. When you’re done, you’ll have a Squash half in cubes, but still in the shape of a Squash half. Take your knife and slide the whole thing into a bowl, and repeat with the other side.
COOKING MULTIPLE ITEMS
So looking at all our recipes here, the Green Beans need to cook at 375°F for about 25 minutes, the Squash for 25 minutes at 450°F, and the Sprouts at 450°F for 18 minutes.
We happen to be graced with multiple ovens. Trying to cook things that need different oven temps and times means you’d have to cook the Beans first, then the Squash and Sprouts, then reheat the Beans right before eating.
But since I have two ovens, I’m pre-heating the upper oven to 450 and the lower oven to 375.
Now that all of our Squash is cubed, we need to get it seasoned and, in the oven, to start cooking.
Savory Maple Roasted Butternut Squash and Brussels’ Sprouts
Into this bowl with our Squash, we drizzle some Olive Oil. Probably about a tablespoon or so. I don’t really measure. I use a big bottle and go by “glugs.” One glug is about a tablespoon. Then we shake some salt in there. And crack some fresh pepper. By the way if you’re looking for something simple to spice up your cooking, a Pepper Mill and some Rainbow Peppercorns. It’s still pepper, but you’ll taste a wider range than black pepper alone will give you.
I like to use a skinny spoon when stirring things up like this. I find that the wider, serving-spoon-size utensils make more of a mess. You want to ensure that all of that Olive Oil is absolutely covering each and every Squash Cube, and you should see pepper flecks evenly distributed throughout the bowl.
Here’s another trick: Wet the pan first.
We want to get some foil on this pan to make cleanup easier later, but we don’t want the foil to stick to the food. Just run some water over the pan, then let it mostly drip off. You don’t want to dry it completely. Take your foil and tear off enough to cover the pan while tucking the ends under the sides. Place it on the pan with the shiny side touching the pan, dull side toward the food. Press the foil down in the center and wipe to the outsides. The water on the pan helps it stick a bit so it won’t bunch up.
Give it one blast of cooking spray, then spread that spray everywhere with a cloth to create a non-stick surface. Add the Squash Cubes and spread them out into a single layer with none touching each other.
We’ll pop this tray into the oven and set the timer to 7 minutes.
The Brussels’ Sprouts
Now we’ll prep another tray the same as we did the first one because our Squash was on the larger side and we’re not going to fit the Sprouts on the same tray.
Take the bowl of Sprouts and dump them into the bowl in which you mixed the Squash Cubes. That bowl is already covered in the same seasonings we’re using, so why dirty two bowls with oil?
Repeat the same Olive Oil, Salt, and Peppering, and dump the Sprouts onto the prepared sheet.
Take the time to place each Sprout half cut-side-down on the sheet. This little step will add loads of flavor that you won’t get otherwise as that flat side browns in the oven.
When that timer goes off, we leave the Cubes in, and add the Sprouts on another rack, then set the timer to 18 minutes (giving the Cubes a full 25 minutes.)
A BIT OF MULTI TASKING
At this point we want to get some heat under the pot of potatoes. I’m setting it to max with the lid on, then I’ll lower it a bit and remove the lid when they start to boil.
We also want to get these beans pre-cooked a bit. The recipe calls for blanching them in boiling water, then transferring to an ice bath. I find it much easier to steam them on the stovetop, so that’s what we’re doing here. They’re done when they turn a Bright Green color; you’ll definitely notice the difference. Once they hit that point, remove from heat and set aside.
I’ve tried multiple methods to cook cauliflower when sneaking it into other things or pretending it’s rice. The trick here is to prevent it from getting watery. The fastest way I’ve found to do that is to microwave it on a plate with a little bit of water, under one of those plastic spatter guard domes. It makes the cauliflower come out cooked, but on the drier side. Super wet cauliflower makes soggy mashed potatoes. So we’re going to pop this in for 5 minutes and then check it.
Mushroom Sauce for the Green Beans
Now, let’s get started on the Mushroom Sauce for the Beans. The recipe we’re using calls for making your own crispy onion topping, but we’re not looking to rock tradition too much, and Kathi and Hana really like French-Fried Onions from a little red and white tub, so we’ll be using those.
For this sauce, melt the butter, then add those Mushrooms and spread them around, rolling them around to get them covered in butter. Let them sit and soak up that butter, stirring occasionally so they don’t burn or stick. After 5 minutes those Shrooms should be ready for the Garlic that I forgot to talk about having copped finely earlier. Again, stirring to get that garlic everywhere and all over those Mushrooms.
Dust the flour over the Shrooms so it’s not all in one big clump, then stir that all up so the flour is everywhere. The flour should cover the Mushrooms and get gummy and drier-looking. If it’s still powdery, you need more butter. If it’s still runny, you need more flour. Stir for about another minute to cook the flour taste out of the flour. Then add your stock.
This recipe calls for ½ cup of Veggie Stock. I made Chicken Stock instead, and I made a bit more, just in case. I’m going to add the stock slowly, stirring as I go, until it starts to look “saucy.” It should be bubbly, wet, and thick looking with no noticeable flour lumps.
Once you’ve hit the right consistency, stir in the Parmesan, then stir in the milk to loosen it back up. Once you’re happy with it, season with salt and pepper, remove from heat and set aside.
Place your beans in your casserole dish, pour the Mushroom Sauce over top, stir it all up, and cover with the Fried Onion Topping of your choice. This one goes into the preheated lower oven at 375 for 25 minutes.
Back to Multi Tasking
When the Potatoes are done we’ll drain off the water and keep the chunks in the same hot pot. I use real butter in my Potatoes. Margarine is a man-made concoction that does not form in the natural world. Butter is the healthier option, and I use about a stick of butter for every 5 pounds of potatoes, which I will now add to these hot potatoes so it melts and soaks in.
While that’s melting we’ll take a look at this cauliflower. Pretty close. We’ll give it another 3 minutes.
The timer is going off on the Squash and Sprouts. The recipe calls for drizzling 4 oz of Maple Syrup over the tray. What I’m doing instead, is dumping both of these trays into an extra-large aluminum bowl, drizzling the Maple Syrup into that, stirring it all up, then spreading it all onto one tray and popping back on the top rack of the oven for another 5 minutes or so to glaze up the Syrup.
Cauliflower Potatoes
Once the Cauliflower is ready, dump it right into the pot with the now melted butter and potatoes, and hand-mash with this hand-masher. You can use electric beaters if you want. I like having some lumps in my potatoes, which the hand-masher gives me nicely.
Mash it up until you can’t tell what’s potato and what’s cauliflower. Add some Greek Yogurt instead of Milk or Sour Cream and mash it until it’s the right consistency. Add salt and pepper to taste and you’re done.
The Big Finish
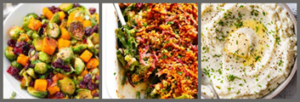
Now each side dish should be done at almost the same time. The Brussel Sprouts and Butternut Squash get put in a bowl, where we will toss in some craisins and sunflower seeds. The Green Bean Casserole is served right in the baking dish on a hot pad. Serve the mashed potatoes and the turkey, and we have our Deliciously Healthy Thanksgiving.
For the real Thanksgiving, don’t forget the gravy, stuffing and cranberries! And we forgot to mention that making home-made cranberries is quick and easy! Kathi uses the recipe found right on the bag, but instead of processed sugar, she uses honey! Mmm! It tastes delicious!
If after reading this, you have any questions, don’t hesitate to reach out! Cooking and healthy eating are two topics I love to talk about! mark@eclecticwellbeing.com
Recent Comments